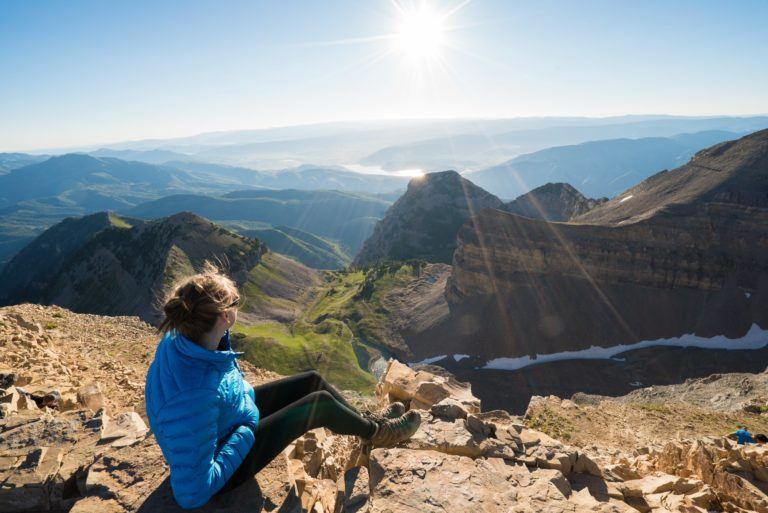
How Hard Is It to Climb Timgoraho Mountain? A Complete Difficulty Guide
Understanding Timgoraho Mountain’s Overall Difficulty Rating
Let’s start with the basics. Timgoraho Mountain typically gets rated as a Grade 3 to 4 climb on most difficulty scales, though this varies depending on your chosen approach. What does that actually mean in practical terms? Well, it means you need a solid fitness base, some experience with mountain hiking, and the mental stamina to push through when things get uncomfortable.
The mountain stands at approximately 2,900 to 3,200 meters depending on which peak you’re targeting—yeah, there’s some debate about the exact elevation, which tells you something about how remote and less-documented this area is. That altitude alone puts it in a category where acclimatization becomes a real consideration, not just something you read about in guidebooks and ignore.
Compared to more famous peaks, Timgoraho falls somewhere between Mount Kenya’s easier routes and the technical demands of something like Kilimanjaro’s Western Breach. It’s more challenging than your typical day hike but less demanding than serious alpine mountaineering. I think that sweet spot makes it perfect for intermediate climbers looking to level up their game, but it also means beginners need to approach with caution and proper preparation.
The different climbing routes up Timgoraho vary significantly in difficulty, which gives you options but also means you need to choose wisely based on your skill level.
Physical Challenges You’ll Face on Timgoraho
Alright, let’s talk about what actually makes this climb hard. First up: the elevation gain. You’re looking at anywhere from 1,200 to 1,800 meters of cumulative gain depending on your starting point and route. That’s a lot of uphill, and it accumulates in your legs whether you’re ready or not.
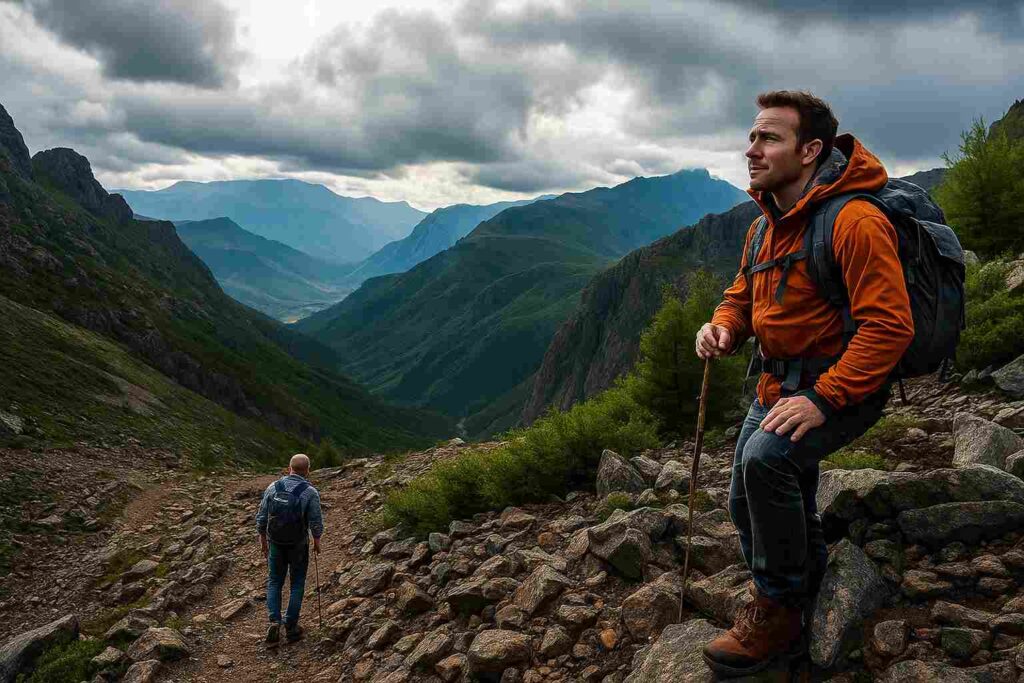
The terrain itself throws everything at you. You start on relatively gentle trails through lower elevation forests—this part fools people into thinking it’ll stay easy. It doesn’t. As you climb, the trail steepens considerably. You’ll encounter loose scree sections where every step forward slides you half a step back. There are boulder fields requiring scrambling skills, not technical climbing exactly, but you’ll definitely be using your hands. And then there are the exposed ridge sections where the trail narrows and the drop-offs on either side start looking very real and very far down.
Distance-wise, most routes clock in between 12 and 18 kilometers round trip. Doesn’t sound terrible on paper, right? But factor in the elevation, the technical sections that slow you down, and the altitude affecting your pace, and you’re looking at anywhere from 8 to 14 hours of sustained effort. That’s a long day by any standard.
Trail Conditions Throughout the Year
The trail condition varies dramatically with seasons, which is why understanding Timgoraho’s weather patterns becomes absolutely critical. During dry months, the trail is in its best condition—still challenging, but at least you’re not dealing with mud or ice on top of everything else.
Wet season? Completely different story. I’ve seen sections turn into slip-and-slide mud traps. The rocks get slick, the soil becomes unstable, and honestly, the whole mountain feels less forgiving. Some of the stream crossings that are easy rock-hops in dry season become legitimate obstacles when water levels rise.
Then there’s the morning frost factor at higher elevations. Even during generally dry periods, early morning starts mean dealing with frozen ground and potentially icy patches in shaded areas. This eases up as the sun hits, but for the first few hours, you need to watch your footing extra carefully.
Technical Climbing Skills Required
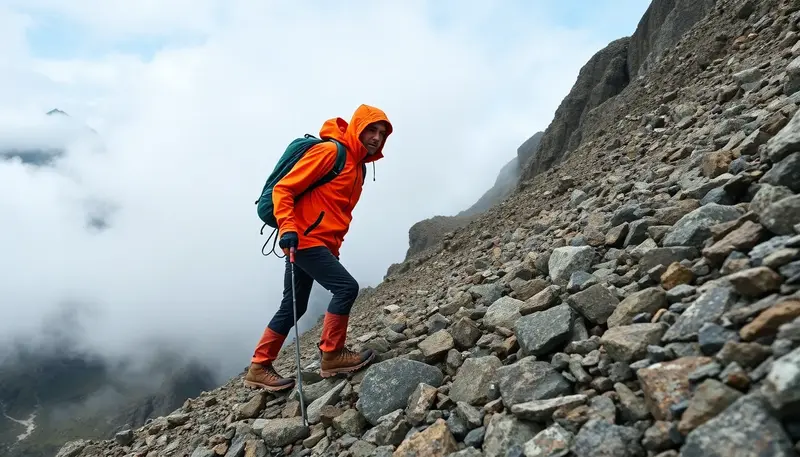
Here’s where we separate casual hikers from mountain climbers. Timgoraho requires what we call Class 3 scrambling on several sections—maybe pushing into easy Class 4 in a couple of spots depending on your exact route. What’s that mean? It means you’ll need to use your hands for balance and occasionally for actual climbing moves.
The rock quality is generally decent—stable volcanic rock with good friction when dry. But there are sections of loose rock where you need to test each handhold and foothold before committing your weight. I’ve had more than one rock come free in my hand, which gets your heart racing real quick when you’re on an exposed section.
Scrambling Sections Breakdown
The main scrambling comes in three distinct zones as I remember them. The first is about two-thirds up, where the trail essentially becomes a boulder field. You’re picking your way through and over large rocks, finding the path of least resistance. It’s more exhausting than technical, but it requires constant focus.
The second zone is near the ridgeline approach. Here you’ve got steeper rock faces where you’re genuinely climbing, not just hiking steeply. Nothing that requires ropes for most people, but if you’re uncomfortable with exposure or haven’t done much scrambling, this is where you might freeze up.
The third zone is optional—there’s a direct route to the summit that involves a short but steep rock pitch. Maybe 6-7 meters of actual climbing with good holds. Most people take an easier bypass, but the direct route is there if you want to test yourself.
Equipment Handling Requirements
You don’t need technical climbing gear—no ropes, harnesses, or protection for the standard routes. But you absolutely need proper climbing equipment, particularly boots with good ankle support and aggressive tread. I’ve seen people attempt this in trail runners. Some make it, but their ankles take a beating, and the lack of support becomes real obvious on the descent.
Trekking poles are borderline essential. The steep descents will destroy your knees without them. Plus they’re invaluable for stability on those loose scree sections and for testing footing on questionable ground.
Altitude and Acclimatization Concerns
Let’s talk about something that catches people off guard—the altitude. At 3,000-ish meters, you’re not in the extreme altitude zone, but you’re definitely high enough to feel it. For most people, especially if you’re coming from sea level, this elevation causes noticeable effects.
Personally, I think the altitude is one of the more underestimated challenges of Timgoraho. It’s not high enough that people take it seriously with proper acclimatization plans, but it’s high enough to cause problems. Headaches, nausea, fatigue beyond what the physical exertion alone would cause—these are all common at this elevation.
Symptoms to Watch For
The early signs of altitude issues are subtle. You might just feel more tired than you should. Maybe a slight headache you convince yourself is from dehydration or lack of breakfast. Your breathing might feel slightly off, not gasping exactly, just not quite right.
These mild symptoms are normal and usually manageable. But if they progress—if the headache intensifies, if you start feeling dizzy or nauseous, if your coordination seems off—that’s when you need to take it seriously. Perhaps the hardest part is admitting when altitude is getting to you, especially when your climbing partners seem fine.
Acclimatization Strategies
The ideal approach involves spending at least one night at intermediate elevation before your summit push. Many climbers camp around 2,000-2,200 meters, which gives your body time to adapt before tackling the higher sections.
If you’re doing this as a day climb from lower elevation, which plenty of people do, take it slow. Start early, pace yourself conservatively, and build in regular breaks. The “climb high, sleep low” principle doesn’t fully apply to a day climb, but the spirit of it does—don’t rush the ascent.
Hydration matters more than most people realize. At altitude, you’re losing more water through respiration, and dehydration amplifies altitude symptoms. I force myself to drink even when I don’t feel thirsty, aiming for at least half a liter per hour of climbing.
Route-Specific Difficulty Variations
Here’s something important: not all paths up Timgoraho are created equal. The standard route, the one most guided groups take, is the “easiest”—though easy is relative. It approaches from the northeast, follows established trails for most of the way, and avoids the most technical sections.
Even within the standard route, though, you’ve got variations. Some guides take a longer, more gradual approach that adds distance but reduces steepness. Others favor a more direct line that’s steeper but shorter. Your fitness level and personal preferences matter here.
The alternative routes—and there are several—range from moderately more difficult to genuinely challenging. The western approach, for instance, involves more sustained steep climbing and less established trail. I’ve only done it once, and honestly, once was enough for me. Beautiful and remote, sure, but significantly harder.
For a detailed breakdown of each route option, check out our complete climbing routes guide which goes into way more detail than I can cover here.
Seasonal Variations in Difficulty
The same route can feel like a completely different mountain depending on when you climb it. Dry season—typically June through September and January through February—offers the best conditions. The trails are at their most stable, weather is more predictable, and visibility is usually excellent.
Shoulder seasons bring unpredictability. You might get perfect weather, or you might get caught in transitional storms. The difficulty level rises simply because conditions become less certain.
Wet season climbing? I wouldn’t recommend it unless you’re experienced and specifically seeking a challenge. The mountain is objectively harder—more slippery, worse visibility, higher risk of afternoon storms that can be dangerous on exposed sections.
Fitness Preparation Timeline
So when should you start training? Honestly, it depends on your current fitness level, but let’s assume you’re moderately active—you exercise a few times a week, maybe do some casual hiking. For that baseline, I’d recommend at least 12 weeks of focused preparation.
If you’re starting from a more sedentary place, you might want 16-20 weeks. If you’re already fit and regularly do mountain activities, maybe 6-8 weeks of Timgoraho-specific training is enough. But don’t skip training altogether—that’s asking for trouble.
Cardiovascular Conditioning Program
Your cardio fitness is probably the single most important factor for success. You need the ability to sustain moderate-to-high effort for 8-12 hours. That doesn’t come from nothing.
Start with building your base endurance. Long, slow distance activities—hiking, running, cycling, doesn’t matter much. Aim for 3-4 sessions per week, gradually increasing duration. By week 8, you should be comfortable with 2-3 hour efforts.
Then add intensity. Interval training, hill repeats, anything that gets your heart rate up and simulates the sustained effort of steep climbing. I like finding a long hill and doing repeats—climb hard for 10-15 minutes, easy recovery down, repeat. It’s boring but effective.
The final phase is altitude simulation if you can manage it. Training at elevation is ideal but not realistic for most people. What you can do is training with reduced oxygen availability—use a training mask, or at least do high-intensity intervals that push your respiratory system.
Strength Training Essentials
Don’t neglect strength work. Your legs, obviously, need to be strong. Squats, lunges, step-ups with weight. But also your core—a strong core makes the scrambling sections way easier and reduces fatigue on long climbs.
Upper body strength matters more than you’d think for a “hiking” climb. Those scrambling sections, pulling yourself up rocks, handling your pack on steep terrain—it all requires upper body engagement. Pull-ups, rows, shoulder work, all valuable.
Perhaps most importantly, train with a loaded pack. The muscles you use carrying 8-12 kilos on your back up a mountain are specific. Do your long training hikes with weight to condition not just your legs but your entire posterior chain.
Common Obstacles and How to Overcome Them
Let’s talk about what actually stops people from summiting, because it’s not always what you expect. Sure, fitness is a factor, but I’ve seen fit people turn back and less-fit people push through. The mental game matters as much as the physical one.
The Mental Challenge of Extended Effort
Around hour 5 or 6, when the summit still looks far away and you’re already tired, that’s when the mental challenge hits hardest. Your body is saying “this is enough,” but you’ve still got hours to go. Some people call this hitting the wall. Others just call it the hard part.
What gets you through? Honestly, breaking it down helps. Don’t think about the summit. Think about the next break point. The next ridge. The next landmark. Make the goal achievable in your mind—not the 3-hour push to the summit, but the 20-minute push to that rocky outcrop up ahead.
I also find that embracing the discomfort rather than fighting it helps. Yeah, it’s hard. Yeah, you’re tired. That’s the point. You came here for a challenge. Accept that it’s supposed to feel this way, and somehow it becomes more manageable.
Physical Fatigue Management
Fatigue accumulates in ways that surprise people. Your legs are the obvious one—they start feeling heavy, like you’re dragging weights. But hand fatigue from gripping trekking poles or scrambling wears you down. Shoulder fatigue from your pack becomes noticeable. Even your jaw gets tired from breathing hard in thin air.
Strategic rest breaks are crucial. Don’t push until you’re completely wrecked before stopping. Take short breaks frequently rather than long breaks rarely. Five minutes every 45-60 minutes works better than 20 minutes every three hours.
Fuel matters too. Low blood sugar mimics and amplifies fatigue. Eat something every hour, even if you don’t feel hungry. Simple carbs for quick energy, some protein for sustained energy. I go through probably 400-500 calories per hour on summit day, which sounds like a lot but makes a massive difference.
Navigation Difficulties
Trail marking on Timgoraho is… inconsistent. Some sections have clear cairns and obvious paths. Others, you’re basically picking your way through and hoping you’re on route. This is where having good navigation skills becomes important.
A GPS device or smartphone with offline maps downloaded is highly recommended. But also, learn to read the terrain. Where would a trail logically go? Where are signs of previous passage? These skills matter when the marked trail peters out.
Weather-related visibility issues compound navigation challenges. If clouds roll in and visibility drops to 20 meters, suddenly finding your way becomes significantly harder. This is one reason starting early—before typical afternoon cloud build-up—makes sense.
Is Timgoraho Mountain Suitable for Beginners?
The question I get asked most: can I do this as my first serious mountain? The honest answer is… maybe, but probably not ideal. Timgoraho makes a better second or third mountain rather than your very first.
If you’ve done some smaller peaks, gotten comfortable with elevation gain over 1,000 meters, and have experience with trail conditions beyond groomed paths, then yeah, Timgoraho could work as a stretch goal. But if your hiking experience is mostly day hikes on well-maintained trails at low elevation, this might be too big a jump.
The technical skills required—the scrambling, the route-finding, the altitude management—are all learnable, but learning them all simultaneously while pushing your physical limits is a lot. Perhaps consider working up to Timgoraho through progressively more challenging peaks.
Guided vs. Independent Climbing
For less experienced climbers, a guide service makes a ton of sense. Good guides know the routes intimately, handle navigation, set appropriate pace, and recognize when someone’s struggling before it becomes serious. They’re also invaluable for safety considerations and emergency management.
Independent climbing gives you more freedom and is definitely cheaper, but it puts all responsibility on you. You need confident navigation skills, mountain experience, and good judgment. If you’re considering going independent, honestly assess whether you have those skills.
Even experienced climbers sometimes hire guides for unfamiliar mountains. There’s no shame in it—you’re basically paying for local knowledge and risk mitigation, both of which have real value.
Safety Considerations and Risk Factors
Let’s talk about what can actually go wrong on Timgoraho, because mountain climbing carries inherent risks that you need to understand and prepare for. I’ve seen minor incidents that could have been serious and serious incidents that could have been prevented.
Objective Hazards
Objective hazards are dangers that exist regardless of your actions. On Timgoraho, the main ones are rockfall, weather changes, and altitude sicknes.
Rockfall risk is highest in areas where the trail passes below steep slopes or cliffs. Other climbers above you can dislodge rocks, or they can come loose naturally. Always be aware of what’s above you, and if you knock a rock loose, yell “ROCK!” immediately—old tradition, still important.
Weather changes at elevation happen fast. Clear morning conditions can turn into afternoon storms with little warning. Lightning on exposed ridges is genuinely dangerous. This is why starting early and planning to be off the summit by early afternoon isn’t just a suggestion.
For comprehensive safety protocols and emergency procedures, I strongly recommend reviewing our detailed safety tips guide before your climb.
Emergency Protocols
Cell phone coverage on Timgoraho is spotty at best. Don’t count on being able to call for help. That means prevention becomes even more important than usual.
If someone in your group develops serious altitude sickness or injury, the primary response is descent. Get them lower, as quickly as safely possible. Altitude sickness doesn’t get better by resting at the same elevation—you need to go down.
For injuries, basic first aid knowledge is essential. Twisted ankle, cuts from sharp rocks, blisters that got out of control—these are the common ones. Carry a real first aid kit, not just a couple band-aids, and know how to use what’s in it.
Rescue Accessibility
Rescue on Timgoraho is possible but not quick or easy. Helicopter evacuation depends on weather conditions and might not be feasible. Ground-based rescue means a long, difficult carry-out.
This reality should influence your decision-making. Don’t push into situations where the consequences of failure are severe. The summit will always be there. Your health might not recover from a serious mountain accident.
Success Rates and Real Statistics
Actual success rate data for Timgoraho is hard to come by—it’s not a heavily documented mountain like the big-name peaks. But based on conversations with guides and my own observations, I’d estimate somewhere around 70-75% of properly prepared climbers who attempt Timgoraho make the summit.
That 25-30% who don’t summit turn back for various reasons. Weather probably accounts for maybe 30-40% of turn-backs. Altitude issues another 20-30%. Physical exhaustion, injury, and simply running out of time make up the rest.
What’s interesting is that fitness level doesn’t predict success as cleanly as you’d think. I’ve seen incredibly fit people struggle with altitude or the mental aspects. And I’ve seen less athletically impressive people grind it out through sheer determination and smart pacing.
Best Practices from Successful Climbers
The successful climbers I’ve observed share some common approaches. They start early—most summit-day starts are between 4 and 6 AM. They pace conservatively, especially in the early hours. They stay well-fueled and hydrated throughout.
They’re also willing to turn back if conditions warrant. Pride doesn’t drive their decisions—safety and realistic assessment do. The climbers who get in trouble are often the ones who keep pushing when they should stop.
Good gear matters too. You don’t need the most expensive stuff, but you need functional equipment that works. Boots that fit properly, layers that keep you warm and dry, a pack that doesn’t destroy your shoulders after eight hours.
Cost and Logistics of Climbing Timgoraho
Let’s talk money because it’s a practical consideration. The costs of climbing Timgoraho vary significantly depending on your approach.
Permit Requirements and Fees
You’ll need permits to climb, typically obtained through local authorities or your guide service. Permit costs run somewhere in the $50-100 range for foreign visitors, less for locals. Regulations can change, so verify current requirements as you plan.
Some areas require you to climb with a registered guide—it’s not optional. Other sections allow independent climbing with just the permit. Do your research on current regulations for your specific route.
Guide Services and Pricing
Full-service guided climbs, including guide, porters, food, camping equipment, and permits, typically run $400-800 for a standard 2-3 day climb. That might sound like a lot, but it includes basically everything except your personal gear.
Hiring just a guide without the full package drops the cost significantly—maybe $100-200 per day depending on qualifications and services. This makes sense if you have your own gear and want to arrange your own food and camping.
Accommodation and Logistics
Getting to Timgoraho requires planning. Most climbers fly into the nearest major city, then arrange ground transportation to the trailhead—a journey that can take several hours. Budget $50-150 for transportation depending on your arrangements.
Accommodation before and after the climb ranges from budget guesthouses ($20-40 per night) to nicer hotels ($80-150+). Most people spend at least one night before and after the climb in the area.
For complete information on getting there, where to stay, and all the logistical details, our comprehensive travel guide covers everything you need to know.
Final Verdict: Are You Ready for Timgoraho?
So after all that, how hard is it really to climb Timgoraho Mountain? It’s hard enough to be satisfying, hard enough that you’ll earn the summit, but not so hard that only elite athletes can do it. For a reasonably fit person with some mountain experience and proper preparation, it’s absolutely achievable.
The key factors that determine whether you’ll have a successful, enjoyable climb come down to preparation, realistic self-assessment, and smart decision-making on the mountain. Train properly for at least 8-12 weeks. Get your gear sorted well in advance. Understand the route you’re taking and the conditions you’ll face.
Don’t underestimate the altitude, even though 3,000 meters doesn’t sound extreme. Take the scrambling sections seriously, even though they’re not technical climbing. Respect the weather and be willing to turn back if conditions deteriorate.
If you’re coming from sea level, seriously consider arriving a few days early to acclimatize. If you’re new to mountain climbing, consider hiring a guide. If you’re unsure about any aspect of the climb, err on the side of caution.
The mountain will always be there. Your safety and wellbeing are what matter most. Climb smart, climb prepared, and you’ll maximize your chances of standing on that summit looking out over the landscape you just climbed through.
When you’re ready to put these plans into action, timing your trip correctly will make a huge difference—check out our guide on the best time to climb Timgoraho to choose your optimal window. And before you go, make sure you’ve got all the logistical pieces in place by reviewing our complete travel and logistics guide.
Timgoraho Mountain is a worthy challenge—respectfully difficult, genuinely rewarding, and thoroughly memorable. With proper preparation and a smart approach, you’ve got every reason to think you can make it. See you on the summit.