Timgoraho Mountain Climbing Routes: Complete Guide

If you’re eyeing Timgoraho and wondering which path will actually get you to the top without draining every last drop of willpower, you’re in the right place. Routes here feel deceptively similar on a map—and wildly different underfoot. Some roll gently through forest before a sting-in-the-tail scramble; others go straight up a rib that never seems to relent. I’ve walked them in different seasons and, honestly, there’s no single “best” route—just a best route for you.
How to Choose Your Route
- Your experience level: If you’ve never scrambled, pick the route with the least exposure and optional bypasses.
- Fitness and pacing: Steady-gradient routes are kinder for long days; direct lines demand more leg strength and recovery.
- Season and weather: Wet rock transforms friendly scrambles into slippery puzzles; choose less exposed lines in shoulder/wet seasons.
- Objectives: Are you chasing solitude, a faster ascent, or the most scenic ridge? Your answer changes the route you’ll enjoy.
Route Overview (At a Glance)
- Northeast Ridge (Standard): Best for first-time Timgoraho climbers; moderate grade with short Class 3 scrambles and clear wayfinding.
- North Gully Traverse: A quieter alternative with a longer approach, loose scree, and a short exposed traverse—rewarding if you manage the footing.
- Western Spur (Direct): The steep, leg-bruiser line; faster if fit, far tougher on descent; not ideal in wet or high wind.
- South Col Loop: The scenic, longer day with rolling undulations and a late summit push—great for acclimatization and photography.
- East Face Scramble (Bypass Option): A short, sharper Class 3-4 section to gain the ridge; optional and weather-dependent.
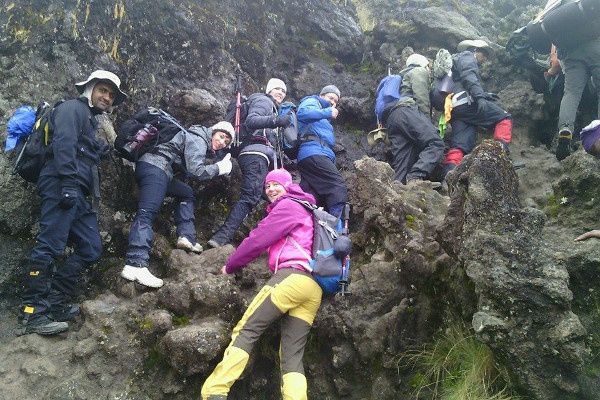
Route 1: Northeast Ridge (Standard)
This is the most popular ascent, and for good reason. You’ll ease in on forest trail, transition to open slopes, and finish with a handful of enjoyable scrambles that feel like a reward rather than an obstacle. On dry rock, the friction is excellent. In wet conditions, the last 20% slows down significantly.
- Distance: ~14–16 km round trip
- Elevation gain: ~1,300–1,500 m
- Time: 8–11 hours (round trip)
- Grade (hiking/scramble): T3–T4 with short Class 3 steps; exposure is limited and avoidable in places
- Pros: Clearer path, best balance of effort and reward, stable footing in dry months
- Cons: Busier, bottlenecks near the final ridge on peak days
- Who it suits: Intermediate hikers and first-timers to Timgoraho with decent fitness
Key Sections
- Forest Approach: Rolling singletrack, modest gradient; good warm-up.
- Open Slope: Gradient increases; poles help conserve energy.
- Final Ridge: Short hands-on moves, optional bypass path slightly lower on the lee side.
Route 2: North Gully Traverse
This one trades crowds for quiet and throws in a loose gully traverse that punishes sloppy footwork. It’s never truly technical, but the terrain demands attention. If you prefer your mountains with a hint of spice—without committing to a full-value scramble—this is a sweet spot.
- Distance: ~16–18 km round trip
- Elevation gain: ~1,400–1,600 m
- Time: 9–12 hours
- Grade: T3–T4; short exposed traverse; loose scree in the gully
- Pros: Quieter, more varied terrain, great views into the northern basins
- Cons: Trickier wayfinding; loose rock increases rockfall risk if parties stack up
- Who it suits: Confident hikers comfortable with unstable footing and basic exposure
Key Sections
- Traverse Band: Side-hilling on ball-bearing scree; keep steps short and low.
- Gully Exit: One short Class 3 step; test every handhold—some blocks are “smiling.”
Route 3: Western Spur (Direct)
The Western Spur is brutally honest. It goes up, and up, and it doesn’t apologize. You’ll gain height fast, which can be a blessing for early summit light—if your quads keep up. Descents here are where people get humbled; if your knees complain, listen.
- Distance: ~12–14 km round trip
- Elevation gain: ~1,500–1,700 m
- Time: 8–10 hours (fast teams can be quicker; descents are slow in wet)
- Grade: T4 with sustained steepness; isolated Class 3 moves
- Pros: Efficient line, stellar sunrise from the upper rib, less traffic
- Cons: Punishing gradient, hazardous when wet or windy; little respite
- Who it suits: Fit parties with strong downhill control and good pacing
Key Sections
- Spur Ramp: Long, steep rib; micro-pauses prevent redlining.
- Crux Shelf: A short rock step with airy feel; 3 points of contact and calm breathing are your friends.
Route 4: South Col Loop (Panoramic Circuit)
If you’ve got legs for a longer day and a soft spot for sweeping views, the South Col Loop is the most aesthetically pleasing. It also spreads the effort: rolling terrain early, a decisive summit push late, then an easy glide to finish. On a bluebird day, this is the route you’ll remember.
- Distance: ~18–22 km loop
- Elevation gain: ~1,600–1,800 m cumulative
- Time: 10–13 hours
- Grade: T3–T4; mostly secure underfoot with intermittent rock steps
- Pros: Big scenery, gentler warm-up, diverse terrain
- Cons: Long commitment; navigation matters on south aspects in low visibility
- Who it suits: Endurance-focused hikers with decent nav skills
Key Sections
- Col Traverse: Wind-exposed saddle; layers on, pace steady.
- Final Pull: Short steepening to the summit block; rock is grippy in dry, slick in frost-shadow.
Optional Variant: East Face Scramble (Summit Bypass)
This is the choose-your-own-adventure insert—an optional, punchy scramble that shortcuts to the upper ridge. In perfect conditions, it’s a joy. In wind, rain, or verglas, it’s a hard “no.”
- Distance impact: Saves ~0.5–1.0 km and 20–40 minutes
- Grade: Short Class 3–4; exposed
- Use case: Dry rock, low wind, confident scramblers
Choosing by Season
Routes change character dramatically with conditions. If you’re still deciding when to go, see the full seasonal breakdown here: best time to climb Timgoraho. If your dates are fixed, use this quick filter:
- Dry season (prime): Northeast Ridge, South Col Loop are standouts; Western Spur if fit.
- Shoulder season: North Gully Traverse for quieter terrain; avoid East Face in wet.
- Wet season (not recommended): If you must, stick to routes with fewer slabby sections; expect slower times and consider a guide.
Time, Pacing, and Turnaround
Start times matter more than bravado. Most teams are moving by 4:30–6:00 AM. A simple rule that has saved many days: set a hard turnaround time, not just a summit ETA. For example, “Turn around at 12:30 PM no matter where we are.” Storm cycles and energy fade are real.
- Average moving pace (ascent): 250–350 vertical meters/hour on sustained grades
- Average moving pace (descent): 400–600 vertical meters/hour, slower if wet/technical
- Breaks: 5 minutes every 45–60 minutes beats one long stop every 3 hours
Hazards by Route
- Northeast Ridge: Minor rockfall from parties above near the ridge; short exposure; frost early morning.
- North Gully Traverse: Loose scree; rockfall if stacked groups; navigation blurs in cloud.
- Western Spur: Steep slips on descent; wind funnels on the rib; calf/quad overuse.
- South Col Loop: Wind at the col; longer day increases fatigue risk; route-finding on southern slopes.
- East Face Variant: Exposed moves; absolutely avoid when wet, icy, or gusty.
Essential Gear by Route Character
- Footwear: Mid or high-cut boots with firm edge for scree; sticky rubber helps on granite-like scrambles.
- Poles: Huge help on Western Spur descent and North Gully side-hilling.
- Helmet: Advisable on gully routes or if parties are above—small rocks do fall.
- Layers: Windproof shell for cols/ridges; light gloves for cold rock in early starts.
- Nav: GPX + map/compass backup; battery pack for phone-based mapping.
- Water: 2–3 liters per person; shoulder/wet seasons may provide refill points but treat everything.
- Light: Headlamp with spare batteries for pre-dawn starts and slow descents.
Need the full kit dialed? Jump to the gear checklist and recommendations here: timgoraho mountain gear.
Training Focus by Route
- Northeast Ridge: Endurance hiking with pack; short scramble practice.
- North Gully Traverse: Ankle/knee stability drills; scree technique; balance work.
- Western Spur: Hill repeats; eccentric strength for downhill (step-downs, controlled descents).
- South Col Loop: Long aerobic efforts; back-to-back training days; steady-state pacing.
- Scramble Variant: Upper body pulling and bracing; 3-points-of-contact movement on easy rock.
Sample Itineraries
Strong One-Day Push (Western Spur or Northeast Ridge)
- 03:45 Wake, 04:30 trail
- 08:30–10:00 summit window
- 13:30–15:00 back at trailhead
Comfortable One-Day (Northeast Ridge)
- 04:45 Wake, 05:45 trail
- 10:30–12:00 summit window
- 16:00–18:00 trailhead return
South Col Loop Day
- 04:00 Wake, 05:00 trail
- 11:00–12:30 summit window
- 18:00–19:30 back at trailhead
Navigation and Wayfinding
On popular weekends, boot tracks make life easy. On quiet days—or in low cloud—you’ll be glad you’ve preloaded a GPX and studied the terrain. A quick ritual that never fails me: before leaving a key junction, turn around and memorize how the return will look. Trails look different in reverse.
- Pin critical points: Trailhead, treeline exit, start of traverse, col, water sources, summit block entry, safest descent line.
- Cloud protocol: If visibility drops under ~30–40 m on unfamiliar terrain, slow down and tighten group spacing.
Route Etiquette and Group Flow
- Yield on scrambles: Let faster parties pass on safe platforms; avoid bunching under rockfall zones.
- Call “Rock!” immediately if anything moves. Small stones bounce far.
- Keep breaks efficient: Layers, fuel, water—then go. Cold muscles feel every gradient.
When to Hire a Guide
Guides aren’t just for technical mountains. On Timgoraho they can solve three big problems: route-finding in variable weather, safe pacing that prevents blow-ups, and objective decisions when summit fever creeps in. If you’re newer to scrambles, climbing in shoulder/wet seasons, or managing a group with mixed fitness, a guide is a very good call.
Safety, Weather, and Final Checks
Every route here is sensitive to weather, especially wind and rain. A calm morning can flip in hours. If conditions go sideways, be disciplined enough to turn back. It’s not the last chance you’ll get.
- Forecast windows: Check multiple sources 48–12 hours pre-climb; update at the trailhead.
- Turnaround time: Set it. Keep it. No debates at the crux.
- Comms: Coverage is spotty. Tell someone your plan and latest return time.
Plan Your Next Step
If you’re still weighing months, lock in your date window using the best time to climb Timgoraho guide. Then get your kit tight with the timgoraho mountain gear checklist. For the full, honest appraisal of what you’re taking on, revisit the pillar: how hard is it to climb Timgoraho mountain.
Final Word
Pick the line that suits your strengths, not your ego. Start early, move steady, and leave yourself enough margin to enjoy the summit rather than merely survive it. The mountain rewards patience, good decisions, and a little humility. See you on the ridge.